.

.

Monday, April 9, 2012

Galvanized Tray-PB Knock-Off

I saw a tray the other day in a Pottery Barn ad.  I was visiting looking at the 3-tier galvanized stand when I noticed that they were also showing a round tray.  I thought to myself, "I can make a tray like that."  I moved on with my day and then at sometime thought...hummmm....I bet they have something galvanized at my local hardware store I could use to make a tray.   Never once did I think....hummmm....do I need a galvanized tray???   The hardware store is an old-fashioned store where you can go in and buy one sheet of sandpaper or one nut or bolt.  So I stopped at the store the next day and began my hunt.  I like to walk up and down the aisles and look at all the items they have there.  Some are familiar and some are not.  I always try to decide if I can make something from the items I find there.  It is a really good way to keep your imagination sharp!
So here's my version of a galvanized tray.


Here's how I made the tray.


I got this round (whatever-you-call-this) at the hardware store.  It cost $4.95 and it was a little dusty.  I marked it in quarters with tape (since I couldn't see pencil marks). 


I got out the drill and the bits.  I had purchased handles at another store and I checked to see if the bit I chose would fit in the hole where the screw would go.  I decided to use a bit that was a little on the small size knowing I could make the hole larger later if I needed to.


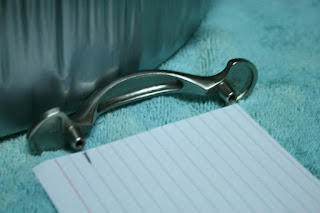
These are the handles I bought.  I couldn't decide, so I bought these that weren't too shiny. 

Now you don't know me, but I don't always measure the way some people do.  I got an index card to mark the distance between the screw holes.


I then folded the card so it would be the distance I needed between the two holes I would drill.  I thought that the card would conform to the side of the tray better than it would be for me to try to measure with a ruler.


I drew these arrows for you. You can see where I'm going to drill the holes. I also folded the card down the distance down from the top where I needed to drill the holes.  The arrow pointing up is lined-up with one of the quarter tape marks I did at the beginning. 

I took it slow and easy (and I wore protective eye ware).  I didn't want the drill bit to dance across the surface of my tray.  It did great!  I substituted the screws that came with the handles for some that were a little shorter.  The substituted screw fit through the hole and into the handle perfectly!  I drilled the next hole and attached the first handle.  On the other side, before I drilled, I measured again and tried to make sure the second handle was directly across from the first handle.  I also decided to apply one piece of clear tape on each of my marks.  It was perfect to help keep the end of the drill bit in place so it wouldn't skim across the side of the tray as I began to drill.


I found these little "collars" in with the nuts, bolts and screws.  I decided to try them with the project.


They looked nice when they were used with the screws. 
I think they gave the tray a more "finished" look.


Well, what do you think?  I'm pretty happy with the results!


One of the neatest things I discovered was that the round place mats that I have (standard size) fit perfectly into the tray.  I have several colors already and can change up the look of the tray in a flash.


And since I already had an extra set of handles, I went ahead and got another (whatever-it-is-called) and made a second tray in just a few minutes.


Pottery Barn $29.95 for round galvanized tray.


Marsha's under $10.00 for round galvanized tray.


 Hello Summer!

Joining the Party at:


UndertheTableandDreaming


Photobucket


Funky Junk's Saturday Nite Special

Friday, April 6, 2012

Basket Love

I think this time of year many people are very aware of baskets.   I've been thinking about Easter baskets and split white oak baskets these last few weeks.  Dad and I used to make baskets years ago.  One year, we did the craft time at Vacation Bible School at our church and we taught the older kids how to make baskets.  The kids really liked it.  I had a poster that I made as an introduction with references to baskets in the Bible--you know, like Moses, the loaves and fishes and the spies that were lowered over the wall in a basket.  That had to have been a big basket!!

Would you like to see some of
the baskets that we made?  


The two on the ends are egg baskets.  The first time I made
 one of those-well, it wasn't perfect. The one on the right with
the green and red -well, that was my second egg basket. 
I was pleased with that basket since it was more difficult
to make and I had mastered the technique.


Here are two different types of baskets.  The one on the left has a
square bottom and is square at the top.  The one on the left is a
rectangle on the bottom and an oval at the top.  The basket can also
be made so that it is square on the bottom and then round on the top.
Assistant to the photographer, Pumpkin.


Here is my daughter's Easter basket.
She uses the same basket every year. 
I bet you'd use the same basket every year if
your Granpa made your basket and signed it, too!


This is my favorite basket that Dad made.  It's
large and great for transporting casseroles, cobblers
and one of my party favorites, cheese straws!


It is super strong and has a very sturdy handle.
Dad made several of these big baskets for Mom, me
and as gifts to some of our friends.  I saw one
of his baskets still being used yesterday by a friend.
In  the spring of  2006, I lost my big basket. I couldn't
 even remember where I had used it last. I looked
for it everywhere.  I asked friends about it, too.  I was
 sure, since I couldn't find it in our house, that I must
have left it somewhere.  It really bothered me that I
 couldn't find my basket because Daddy had passed
away in November the previous year. 
 I knew I wouldn't be able to replace it. 

Then, one day, I was looking back through the pictures
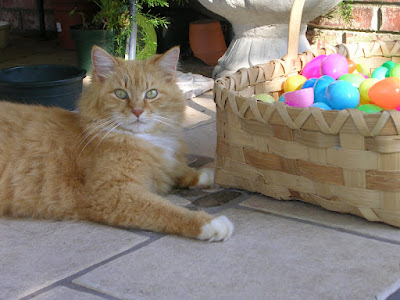
I had taken at Easter and this is what I saw...

With a lot of hope, I asked my husband to pull the attic stairs
 down for me.  And there it was-- Daddy's basket in the attic
 and filled with plastic Easter eggs.  My sweet husband
 had put it in the attic with all the other Easter decorations! 
I was a super happy girl when I found my basket!

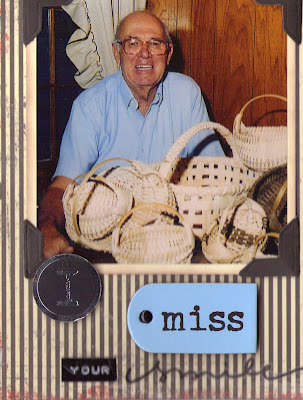
Here's my sweet Daddy with some of his baskets.

Do you have special Easter baskets or
other baskets that you enjoy in your home?
I'd love to hear your basket story!
Happy Easter!
 

Joining the Party with:
FUNKY JUNK INTERIORS'


Funky Junk's Saturday Nite Special


Have a Daily Cup from Mrs. Olson
Share Your Cup Thursday

Share Your Cup Thursday


Monday, April 2, 2012

Uncle Wiggily China

I have this little set of vintage children's china that came from Dad's home in Nebraska. I can just imagine my aunt, Daddy and perhaps his brothers eating from this little china set.  It seems to be an actual set for children and not a "tea party" set. The internet states that the set is children's china from the 1920's and was produced by the Sebring Pottery Company. That time would have fit in with the ages of my family members. 

I decided to make a little display for Easter since the main character on the china is a rabbit.  The rabbit is named Uncle Wiggily Longears.  He was the subject of stories written for children starting in 1910 and published in the Newark News.  Howard R. Garis was the author of the stories that appeared daily (except Sunday) for 30 years. He also wrote 79 books with the same characters.


Here is a close up of the little pitcher.


Here is the cup and saucer.  I have two sets of these.  They are in perfect condition.


I have two little butter pat-sized plates and two larger plates and the one large bowl.


My friend found this beautifully illustrated Uncle Wiggily
book at an antique store and gave it to my daughter several years ago.


The last little detail is an old block that has a rabbit head on one side. 
I don't know where the other pieces are, but I love the
soft features of this friendly little rabbit. There would
have been at least two other blocks to make this
bunny complete --a middle part of the bunny and a block
with the legs and feet. There are pictures on all sides of the block--
some are middles and some are feet. You could interchange the
blocks to make funny characters or arrange them correctly.


Happy Easter--vintage style!


Joining the Party at:


A Stroll Thru Life-Tabletop Tuesday