.

.

Monday, June 22, 2015

Beach Coffee Table with Vintage Touches

I can't believe I've waited this long to bring my shell collection out and begin using them in a few designs around my home. Today, I worked on my coffee table.  It is one of my favorite spots to decorate.
 I started my design with the wire basket
 that I got recently at an antique store. 
 There were several in the store and
 they came from a local industrial site. 
 I love containers--especially baskets.
  They can be so pretty and so useful at the same time. 
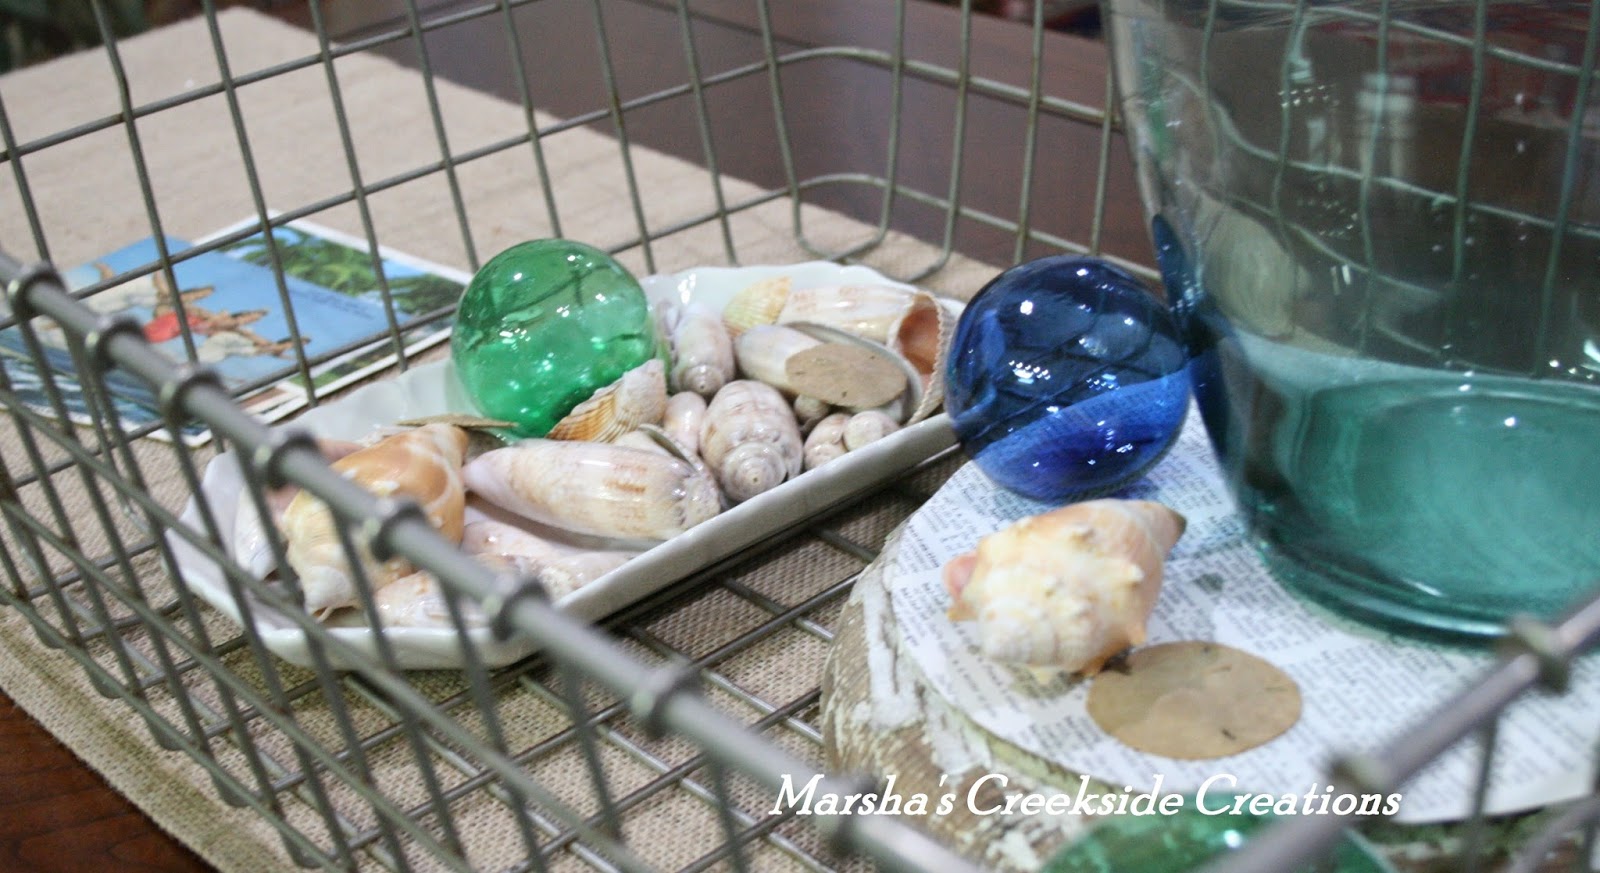
My sweet friend shared with me some of the vintage post cards from her collection.  I love this one from Cypress Gardens.  The ones peeking out at the bottom are from Panama City Beach, Florida.  We used to go to Panama City when I was a little girl.
I found this small iron stone dish last week
 and I decided I'm use it in my design today.
I found all the shells in the dish!
I just love collecting shells.

I got the green vase from Target a couple of years ago.  I love the pretty color.  I put it on top of a round chippy architectural piece that I topped with a page from an old dictionary.
Have you noticed the glass floats?  
I've had them for close to 40 years. 
 Gosh.....I guess that makes them (and me) vintage!
Have you read Mary Kay Andrews' new book, Beach Town
 I have!  Another treat from my favorite author.
I put my great aunt's magnifying glass on top of the book.

 Here's a final look from the sofa.
Thanks for stopping by to see my coffee table.  
The weather is predicted to be pretty hot this week. 
I think I'll stay inside and think of the beach....
I'll be working on a few spots later this

Tuesday, June 16, 2015

Fourth of July Table

I gathered a few red, white and blue items to get ready for the 4th of July.  I might be a bit early--but I'm sure it's okay!
I used the column base
 (from my great-aunt's home) and the red doily that my husband's grandmother made.  The center piece is complete with a Dundee jar filled with a few snips of greenery and a couple of blooms from my knock-out rose.  Just add an American flag and you're done.

Red place mats from Target.
  Napkins (stars and the striped) from Pottery Barn.  
Decorated Sparkler Boxes at each place. 
 Learn how to make these cute boxes: 


I hope you'll be inspired to collect a few items
 and decorate for the 4th this holiday season.
Will you visit friends?  Will you cook out? 

4th of July Sparkler Box Place Cards


 I'm sharing a super easy craft today: my 4th of July sparkler place cards.  Imagine your upcoming holiday meal with these special place cards for your family and friends.
This is fun craft project that doesn't require
 a lot of supplies or too much time, either.  I'll 
walk you through the project with 
detailed pictures....BUT, it's just like
 wrapping a little package.  
SUPPLIES:  You will need a couple of sheets of scrapbook paper.  Red of some type and blue of another.  They can be solids, stripes, dotted--whatever you might have on hand or what is available at your local craft store (sheets are usually 50 cents).  You can decorate about 4 boxes per sheet of scrapbook paper.  Next, you will need sparklers and their boxes.  You'll need craft ribbon, paper tape or wasabi tape and stickers or embellishments.  You may want to use embroidery floss or ribbon, too. 
TOOLS:  A paper trimmer (if you have one-not necessary, though, if you don't have one-use a ruler to measure), scissors, and double-sided adhesive tape or a tape runner.
THE STEPS:  It is just like wrapping a package!!!
Cut your paper.  You decide how much
 of the box of cover in the red.
Empty the box of the sparklers.
Apply two lines of adhesive to the wider side of the box.
  One line of adhesive on the smaller sides.
Then, you just start wrapping the box.
Add some adhesive tape to the last bit
 of the paper before finishing the "wrapping."
When you get ready to fold the ends, you might want to cut a little slit in the paper to make it easier to fold (depending on the thickness of the scrapbook paper).
 Cut the blue paper.

Over-lap the blue paper over the red paper.
Here's what your "wrapped" box looks like.
I had some of this paper tape already.  
You could use wasabi or ribbon here, too.
  No rules--do what appeals to you or use
 whatever supplies you have on hand!

I cut enough embroidery floss to go around the
 box and enough to tie a small bow.
Tuck the sparklers through the ribbon.
You might want to use stickers or some
 other type of embellishments to decorate the box. 
You can add names using stickers or chipboard letters.
  I had these pretty red letters already on hand.  
And.... of course
you don't have to put names on them
 if you are keeping things casual.


Believe it or not, we have two Fourth of July birthdays in our family!
  Happy Birthday Mike and Jane Ann! 

Met Monday