.

.

Tuesday, June 19, 2012

World Traveler Coffee Table

I love to travel.  Do you? 

                                 I thought I would share my
                    world traveler coffee table with you today.  


I usually like to think about vacations to the beach in the summer months. I often like to express those thoughts by decorating my coffee table in my family room with shells, beach pictures and other beach-related items.  This year, I decided to try something a little different. I decided to use some things I have on hand to make what I'm calling a World Traveler Coffee Table.

I haven't painted my furniture, but I decided to lighten
 up the look of my coffee table by adding the linen
 table runner my grandmother made years ago. 


Here's a another view of the table runner.
  It adds a perfect lighter look to the coffee table.


Then I added to the table, this old globe that
 I can always remember being in our home.
  My mom said it is over fifty years old. 


I can remember that this dial on the top always fascinated
me when I was a little girl.  You could see where it was day
 and where is would be night just by the turn of your finger.


I found these vintage-style maps at a store recently.  I thought they might
look good on the table, too.  The magnifying glass came from
 the desk in my great-aunt's bedroom.  I don't know how
 old it is, but my aunt died in 2001 at the age of 100. 
The postcard is from a stack of vintage cards a friend gave
 me several years ago.  It is an old one of Panama City Beach, Florida.


Here are two vintage brochures from The Statue of Liberty
 and The Empire State Building.  I have visited both
 and was happy to find these at an estate sale several years ago. 
 The picture is my favorite one of my
daughter on the streets of New York City in 2011.


Now I have to show you this cute little table that I got for Mother's Day.
  I'd been looking for something like this and was delighted
when I found this on a shopping trip to Birmingham, Alabama. 
I love the distressed look and the yummy turquoise paint on the sides.


I was prowling around at my Mom's the other day, and we found
 this little book from Pompeii, Italy and several Italian coins. 
It brought back memories of a trip long ago that is still fondly remembered.
A piece of vintage sheet music completes the table top.


Here's a final look at my coffee table and the
 new look that I'm so enjoying this summer--Thank you, Blogland! 

What are you enjoying this summer? 
 The fresh fruit?  The sunny weather?  Photos from a recent trip?

I'd love to know what you are loving this summer!

Joining the party at:


Tuesday, June 12, 2012

Last Week, I Vacuumed a Typewriter

Blogging makes us want to try new things.  Like last week, I vacuumed a typewriter.
Yes, because of Blogland, I pulled this 1940 Underwood typewriter out of storage in our garage and I vacuumed it.
  I've seen a lot of typewriters in posts and I thought to myself.....
I have one of those in the garage. HUMMMM......


I decided to update the desk in our family room and
  used the typewriter as my starting point.


This is what my desk looked like before I started my project.


I took everything off the top of the desk and started over.
I borrowed this old wicker tray from my mom.  
It belonged to my great-grandmother.   
The other items are just things I already had in the house.


Here's a close-up of a picture that I already had on the desk. 
I decided it should stay because I haven't had it on the desk for very long.
I added the vintage bottle of ink that you can see on left corner below the picture frame.
Now the picture....this is a special picture. 
 It was made in 1962 of my great-aunt at the newspaper office in our town.
I think the picture looks great in the frame that looks like vintage newspaper type.
I can remember seeing type that looked like
 that in the newspaper office when I was a little girl.


Here's just the photo itself. 

If you look in the background to the right....do you see it?
YEP!  It's the desk!!!! 
The desk that is in my family room.

It used to be in the newspaper office years ago. 
 I can remember that it was dark and dirty
with ink when I was a girl.  But in the 70's (when I was a teen),
it was cleaned-up and refinished and it has been in
my home ever since.  And one  more thing
 about the desk....it used to belong to my great-uncle who
 was born in 1892 .  And, before that, the desk belonged to
HIS daddy and was in his law office...
so this desk is OLD!


Here's another shot of my changes.


I am enjoying the changes that I have made to the desk! 
And now I can say that I have vacuumed a typewriter!!

THANK you BLOGLAND!

Joining the party at:


vif187

Furniture Feature Fridays


Friday, June 8, 2012

Jam and Biscuits

My daughter and I made homemade blackberry jam last night.  For the last few days, I have been picking the wild blackberries in an area near our home.

Of course, there had to be some homemade biscuits to go along with that jam this morning.


Do you do any canning in the summer?  I'd love to hear your story!

Hoping that you each have a wonderful Friday.

Thursday, May 31, 2012

A New Flower Bed

We decided to make a flower bed in our yard this spring.  We had an area in our yard where the grass had been struggling for a couple of years so we decided to put a flower bed in the space.  The most interesting part of the project is the border.  It is made from left -over bricks.


If you have any left-over bricks, this is a great way to use
them to make an attractive, durable and inexpensive border for your flower beds
or other landscaping projects. 
 The border is also a great weed/grass barrier. 

So if you have bricks like this, you can turn them into the border like we did.
We used this same idea about 11 years ago when we built our home.  We have used bricks to make borders for all our planted areas in our yard.  My husband said he has even bumped one with the riding lawn mower and the border didn't give way so they are durable.


Here's our problem area as we got started with the project.  We have red clay.  It is very hard and unpleasant to use for gardening.  My husband dug up the area by hand with a pick ax and shovel.


We had already decided on the shrubbery we were going to use.  We selected Helleri Holly (they look like a boxwood-not a prickly holly). We already had some of these growing in our yard and they seem to do well in the clay.  We also wanted to add some summer color, so we got these knock-out roses.  They bloom all summer and many of our neighbors have them, so we felt like they would do well in the new flower bed, too.  Our other purchase was a Japanese bloodgood maple.  We have two of these in our back yard and they have done well.  We have been composting for several years and we used all that wonderful compost to mix into the clay. 

Here's my husband finishing up the planting in the afternoon sun.


The next task was for me to haul bricks from the back of our property.  I know my husband
was going to do this himself, but I don't mind doing things like this. 


After I got the bricks moved to the area where we were
 going to be using them, I needed to get them
placed just right.  This is the most tedious part of the project. 
 You need to put the person who has
an eye for detail on this job (I'll volunteer). 
The better the bricks look now, the better they will
look when the project is complete. 
You will need a hand trowel to help
even the soil up under the bricks.
  A little scoop there and a little scoop scraped away here. 
The bricks need to be about a finger apart.


This is what ours looked like when I was done. 
Yes, I did continue to tweak them before we finished.


Then, a day or so later, when the ground isn't too wet or soft....you walk on them.
  Don't rock your feet, just walk across them.


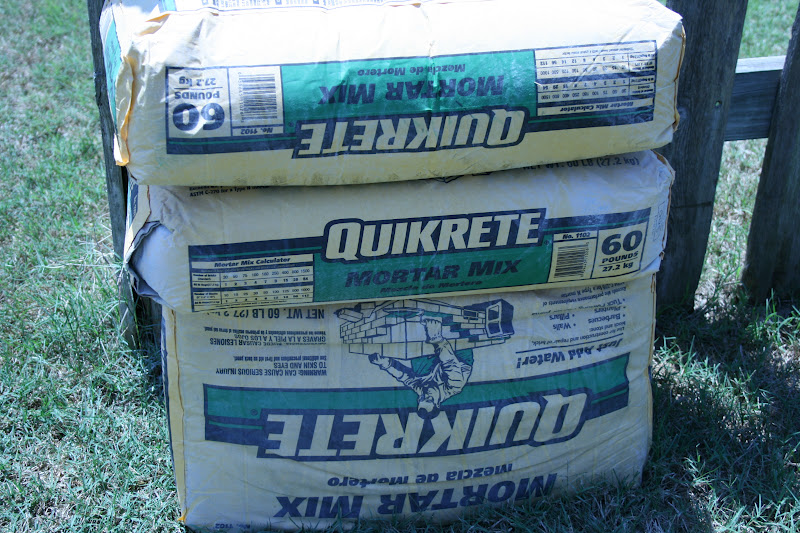
Then, get some cement. Do not get the kind with the little rocks in it. 


Get a few of the plasti-cor campaign signs and cut them into two or three strips.

Place the sign strips on either side of the bricks. 
They should be flexible enough to use with curves.
Then, shovel the DRY cement onto the bricks.
We used to be very careful and exact. We would use a trowel to
put the cement onto the bricks and try to be so neat and tidy.
Nope! Not any more!!
Over the years, we discovered that you could just
shovel that cement in--it looked the same
when the border was complete
and was a lot easier and quicker.


Then, get an old paint brush and brush the cement into the spaces between the bricks.


Your bricks should look like this when you're done.


Now,take your hose and set the nozzle to mist and lightly mist the top of the bricks.


Your bricks will look like this when you're done.
Don't over mist.
Wait about five minutes....move the wheel barrow, have a sip of water, wipe your brow.

Then you remove the sign strips.  Move on and reuse and repeat the steps.


This is what the bricks look like in less than an hour later. 
I did use a large putty knife to scrape off the excess
 cement off the ends before it dried. Remember--details!


I was happy to garden in an area that has full sun.
When we first built our home, we had a lot of
sun in our back yard.  Now, the trees adjacent to our
property block the sun and I'm planting hostas.
 I was delighted to find some Shasta daisies this year. 
Gotta love a daisy--especially since they are perennials.
I planted a few Stella de Oro day lilies, too.
I also added some jonquil bulbs that
I hadn't planted that still seemed pretty healthy.
Now, a couple of weeks later and
everything we planted is doing great.


Here are the pink double knock-out roses.


I moved this garden bench from another spot in our yard. 
I like it here so much better


The brick border cost under $25.00--
the price of five bags of cement.
That's a pretty good price to pay for a border
 that will be enjoyed for years to come!

Joining the Party:


The Great Outdoor Linky Party